One of the most frustrating issues you may encounter when trying to use a microphone is it not working when trying to record sound or when using it for video calls. “Microphone Is Not Working in Windows 10” is a common issue that many users encounter, and it has many different solutions.
Unless you know the specific reason why your microphone may not be working, you will need to try different solutions until you come across one that works for you.
Below are some of the most common solutions to the “Microphone Is Not Working in Windows 10” issue.
Run the Troubleshooter
Windows 10 has a troubleshooting feature that will identify and fix issues with audio automatically. This should be your first step because it’s one of the easiest possible fixes for the “Microphone Is Not Working in Windows 10” issue.
1. Open Settings → Update & Security → Troubleshoot.
2. Under “Recording Audio”, click “Run the troubleshooter”.
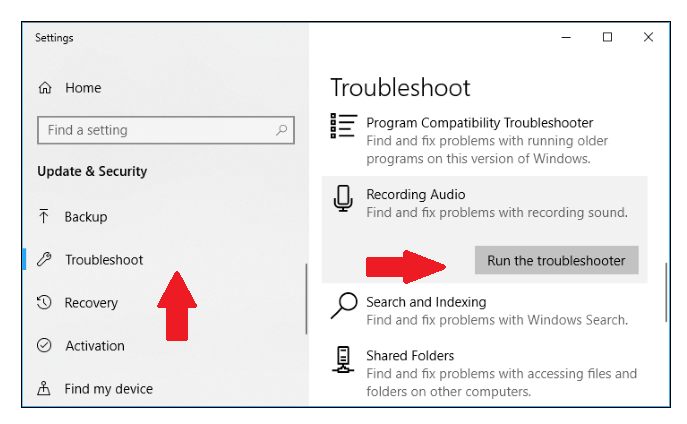
3. Follow the instructions on the screen.
Check that the Microphone is enabled
One simple reason for the “Microphone Is Not Working in Windows 10” issue may be a disabled microphone.
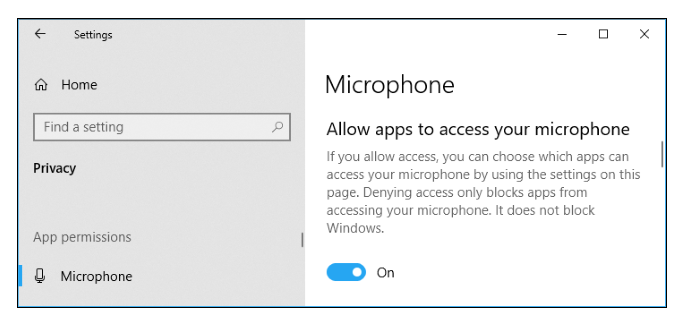
1. Open Settings → Privacy → Microphone.
2. Toggle on the “Allow apps to access your microphone” if it’s off.
Set your microphone as a default device
When you connect your microphone to your computer, it may be necessary to manually set it as your default device to fix the “Microphone Is Not Working in Windows 10” issue.
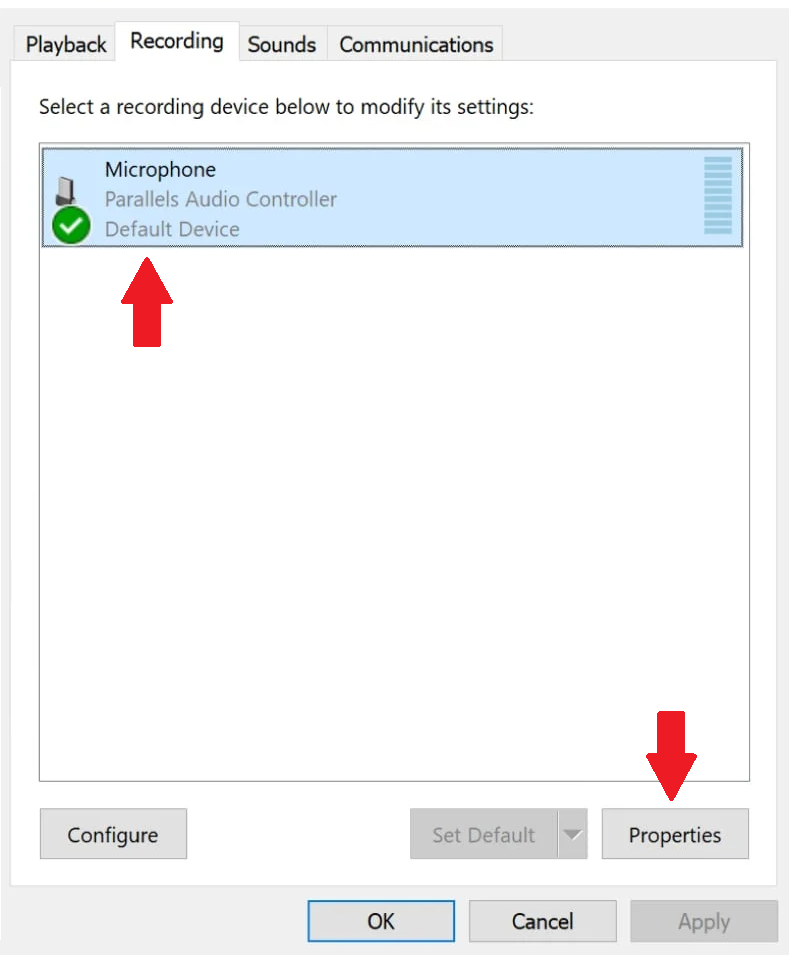
1. Right-click on the speaker icon and click “Recording devices”.
2. In the Recording tab, click on your microphone and click “Set Default”.
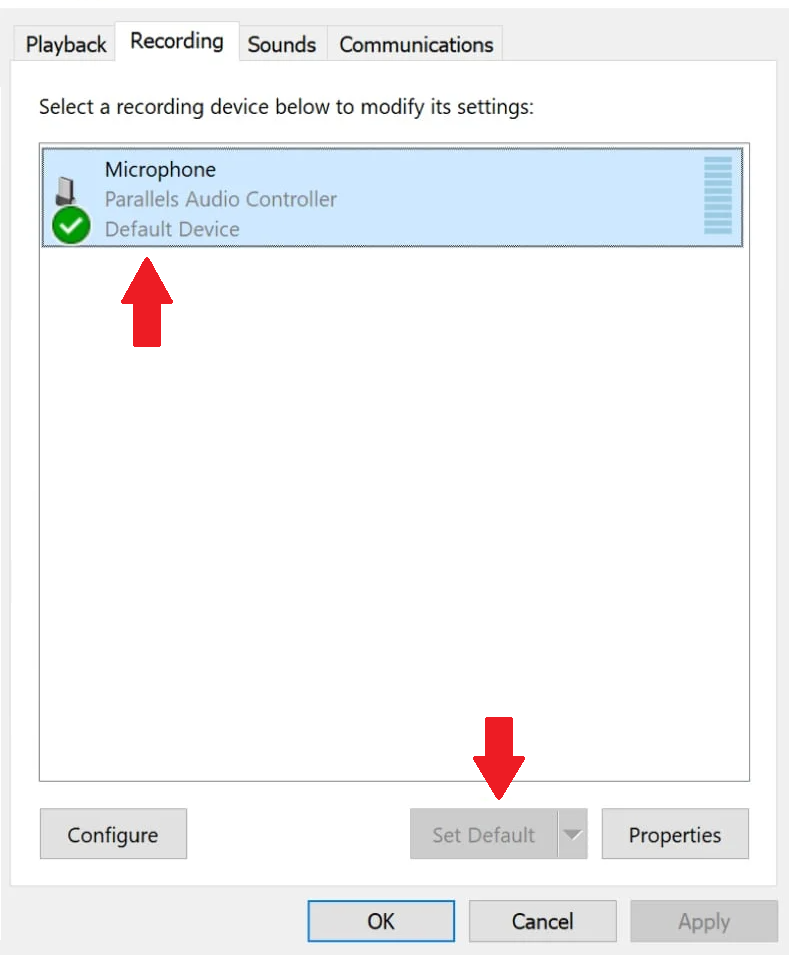
3. If no microphone appears in the list of devices in the Recording tab, right-click on empty space and check both “Show Disabled Devices” and “Show Disconnected Devices”.
4. If your microphone becomes visible, set it as default.
Check that the microphone is not muted
It’s possible that your microphone is muted, hence why it’s not working.
1. Right-click on the speaker icon and click “Recording devices”.
2. In the Recording tab, click on the microphone, and click “Properties”.
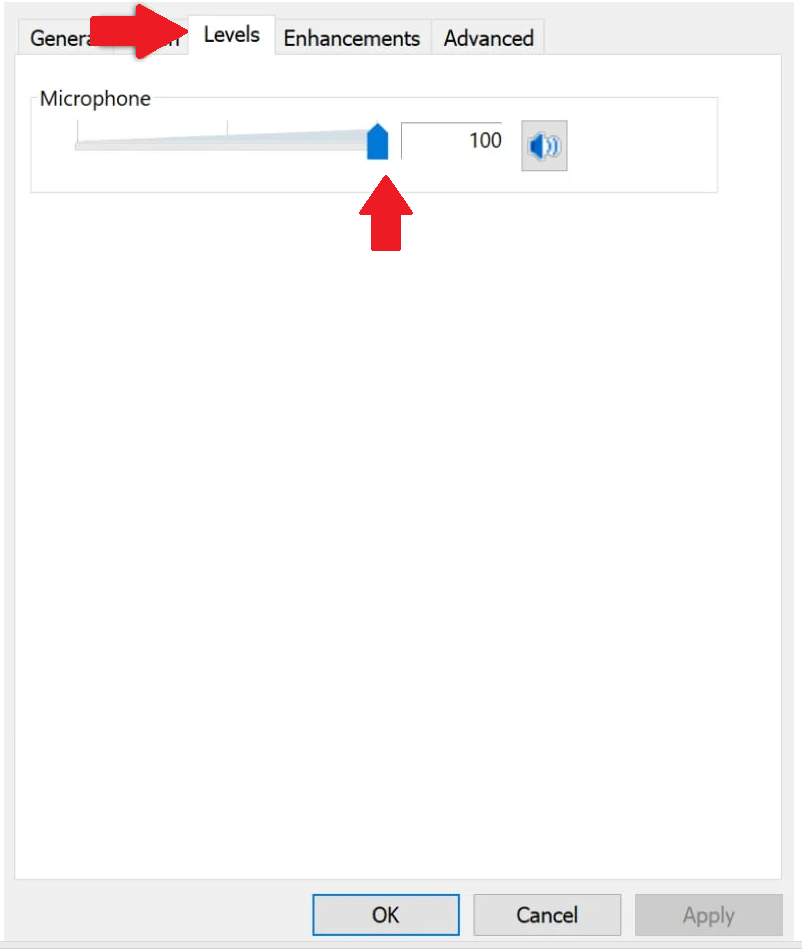
3. In Microphone Properties, open the Levels tab.
4. Unmute the microphone if it’s been muted.
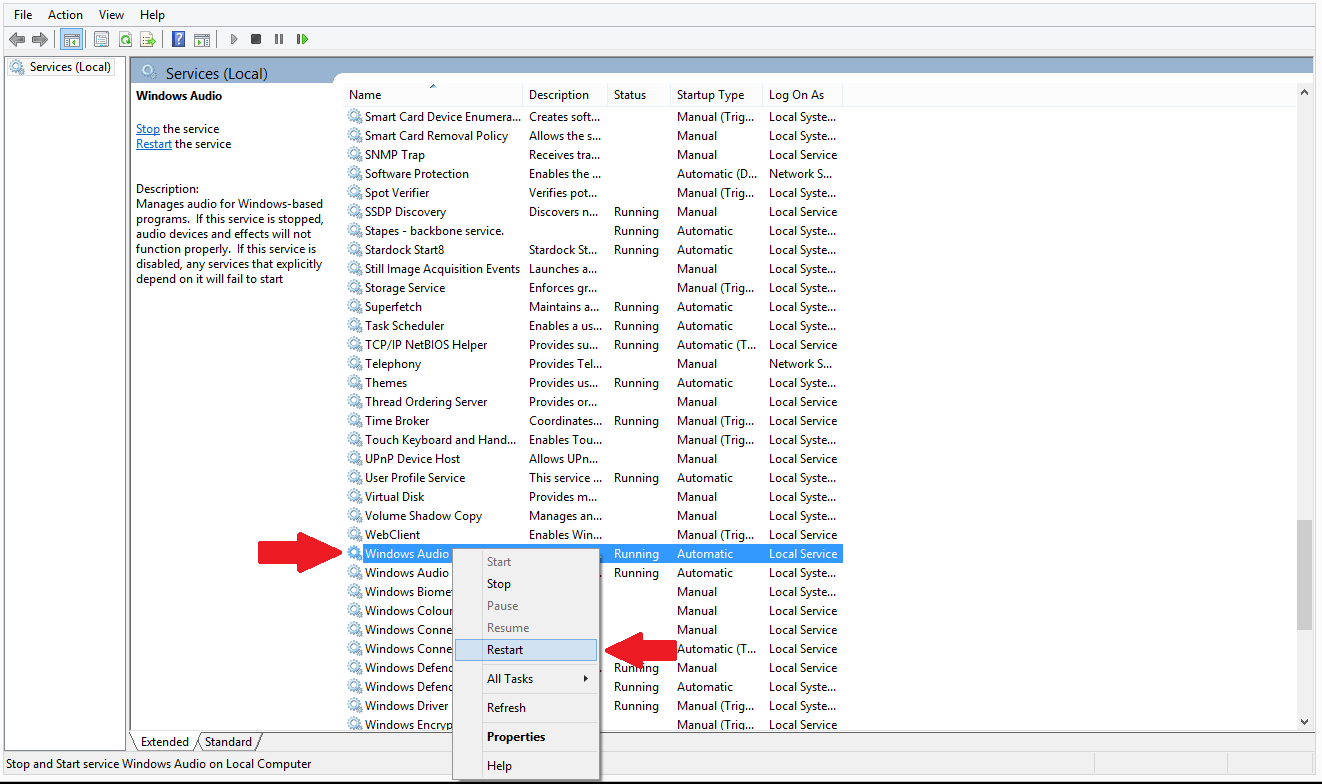
Restart Windows audio service
1. Search “run” and click on the result.
2. In the “Run window, type in “services.msc” and click “OK”.
3. In the Services window, find “Windows Audio” and right-click on it.
4. Click “Restart”.
Check your physical connections
Check that you have correctly plugged in the microphone. If the audio jack seems a bit loose, it’s possible that the connection is the problem. If possible, connect the microphone to a different device. If it’s not working on a different device, you likely need a new microphone.
Reinstall your Microphone drivers
If your microphone appears in your Device Manager, it’s possible that drivers may be incorrect or not up-to-date. It would be easiest to uninstall the driver and have Windows reinstall it automatically.
1. Type “device manager” in search and click on the result.
2. In Device Manager, expand “Audio inputs and outputs”, right-click on your microphone, and click “Uninstall”.
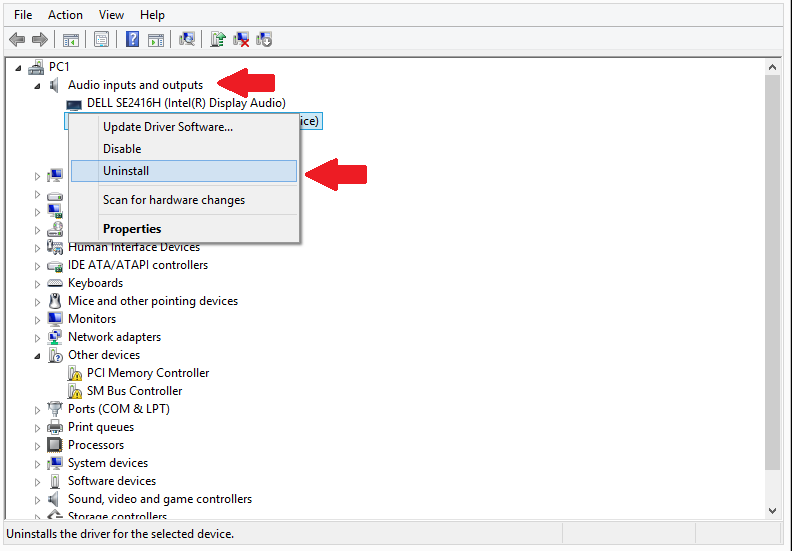
3. Restart your computer. Windows will install the correct driver automatically.
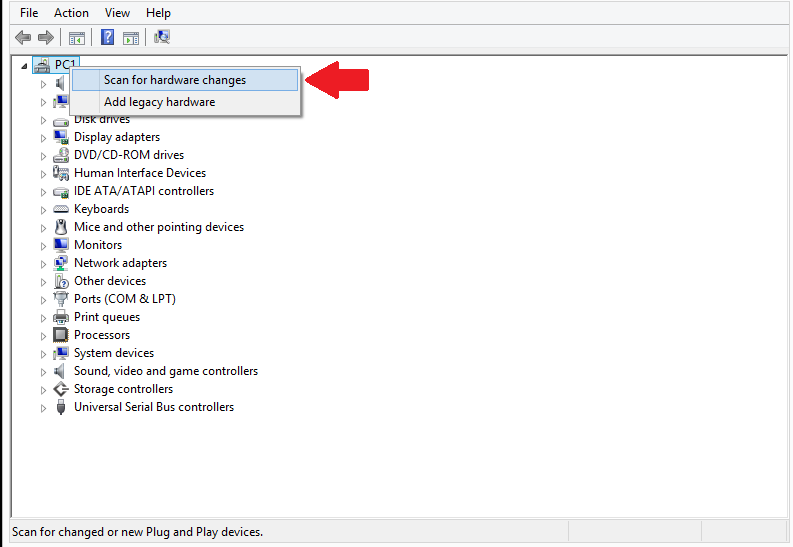
4. If Windows did not install the driver, open Device Manager, right-click on your computer icon and click “Scan for hardware changes”.