What is EasyPhotoEdit
EasyPhotoEdit ads are brought about by an adware on your computer. There is a big chance you will not recall setting up the adware, which means it entered via free program packages. You ought to have no trouble diagnosing the advertising-supported program especially if you are aware of the symptoms. Random advertisements regularly appearing on your screen is the most obvious sign of an advertising-supported application infection. You will come across pretty intrusive ads, and they will appear in all kinds of forms, from banners to pop-ups. You should also note that while an adware isn’t necessarily a dangerous contamination, it’s probable it could reroute to you some malware. If you want to avoid possible malware, it is best you delete EasyPhotoEdit the minute you see its appearance. 
How does EasyPhotoEdit behave?
An adware sets up without you even noticing and generally doesn’t require your explicit permission. An adware is normally attached to a free program as an extra item, and this is called the bundling method. So as to avoid undesirable applications installations, consider a few things. Firstly, adware may come along with the freeware, and the usage of Default mode will basically grant it permission to install. Selecting Advanced (Custom) mode during free program installation would be the right choice as you will not only be able to see the additional items but you will also have the option of unmarking everything. Having to uninstall EasyPhotoEdit would be much harder than it would be to uncheck a few boxes.
When the adware installs onto your computer, your browsing will be interrupted by ads. You might not consider the boost of adverts all that noteworthy but if you notice “Ad by EasyPhotoEdit”, then you have to remove EasyPhotoEdit. The majority of your browsers, such as Internet Explorer, Mozilla Firefox or Google Chrome, will be affected. The threat will begin generate more personalized adverts after some time. The adware will accumulate data about you and then use it to create ads for you. Usually, adverts are harmless, they are mainly attempting to make income, but don’t be shocked if you were led to malevolent software. An advertising-supported software is able to easily expose you to something damaging since it doesn’t check the domains it will lead you to. So as to avoid a possible malicious software infection, remove EasyPhotoEdit.
How to remove EasyPhotoEdit
Depending on how knowledgeable you are with computers, you have a couple of ways to eliminate EasyPhotoEdit. If you opt to uninstall EasyPhotoEdit yourself, it may be more time-consuming because you will have to identify the contamination yourself. Scroll down to find instructions to assist with by hand EasyPhotoEdit termination. However, if you do not believe you can do it, you could use a capable deletion tool to remove EasyPhotoEdit.
Quick Menu
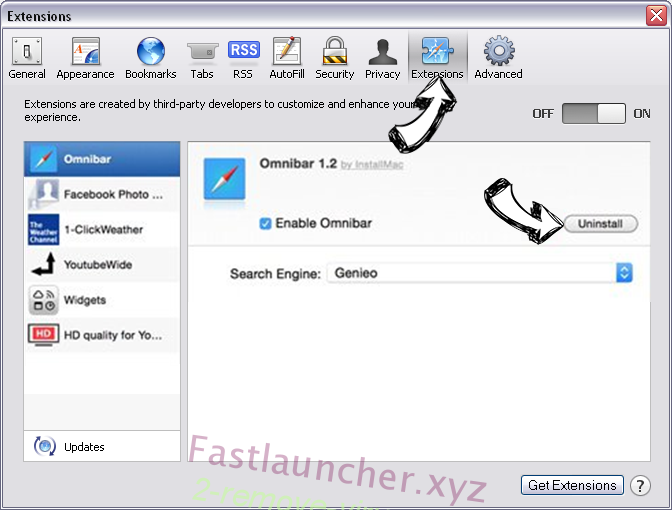
Step 1. Uninstall EasyPhotoEdit and related programs.
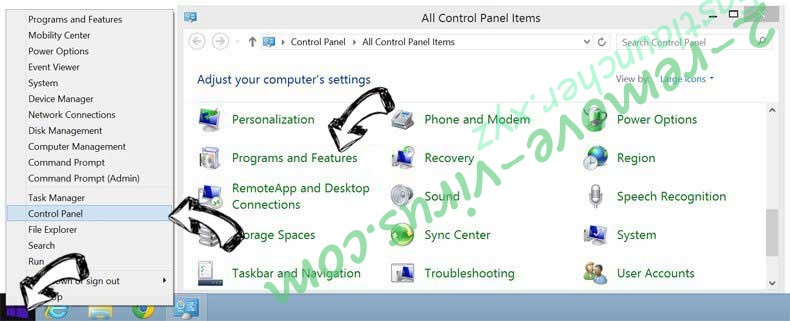
Remove EasyPhotoEdit from Windows 8
Right-click in the lower left corner of the screen. Once Quick Access Menu shows up, select Control Panel choose Programs and Features and select to Uninstall a software.
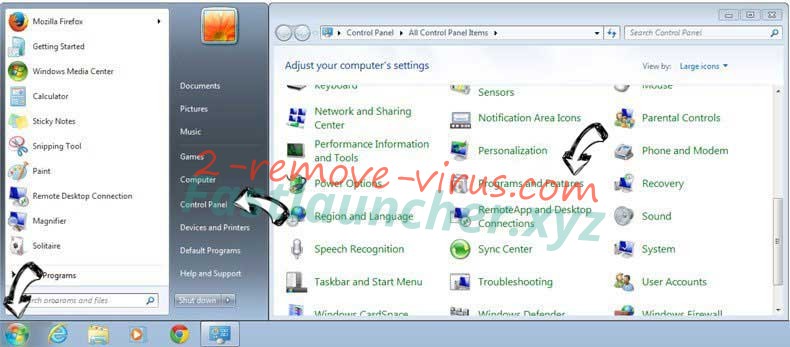
Uninstall EasyPhotoEdit from Windows 7
Click Start → Control Panel → Programs and Features → Uninstall a program.
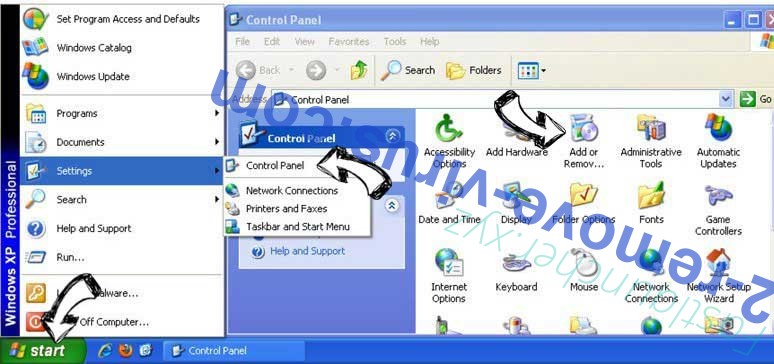
Delete EasyPhotoEdit from Windows XP
Click Start → Settings → Control Panel. Locate and click → Add or Remove Programs.
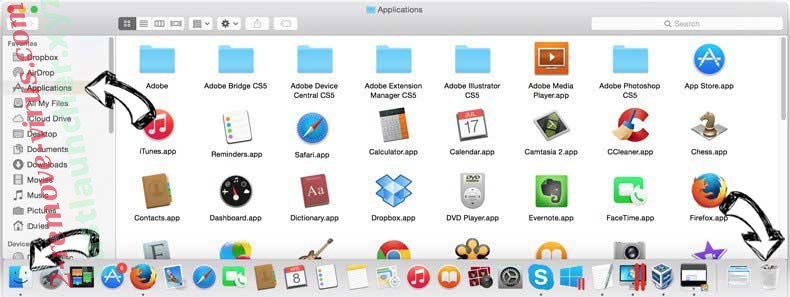
Remove EasyPhotoEdit from Mac OS X
Click Go button at the top left of the screen and select Applications. Select applications folder and look for EasyPhotoEdit or any other suspicious software. Now right click on every of such entries and select Move to Trash, then right click the Trash icon and select Empty Trash.
Step 2. Delete EasyPhotoEdit from your browsers
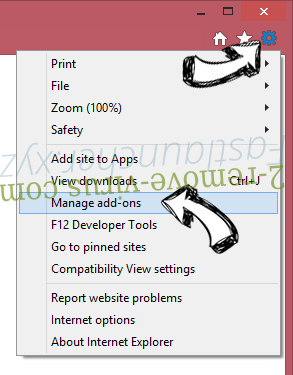
Terminate the unwanted extensions from Internet Explorer
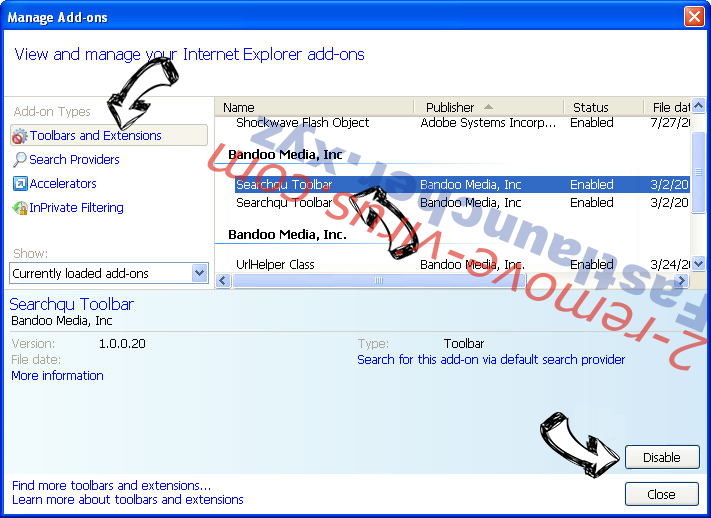
- Tap the Gear icon and go to Manage Add-ons.

- Pick Toolbars and Extensions and eliminate all suspicious entries (other than Microsoft, Yahoo, Google, Oracle or Adobe)
- Leave the window.
Change Internet Explorer homepage if it was changed by virus:
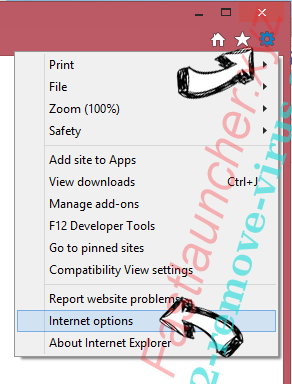
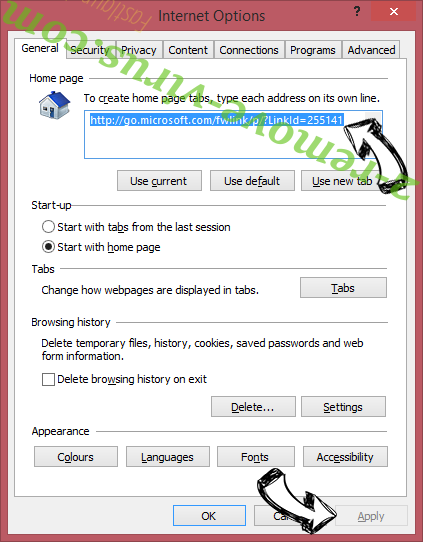
- Tap the gear icon (menu) on the top right corner of your browser and click Internet Options.
- In General Tab remove malicious URL and enter preferable domain name. Press Apply to save changes.
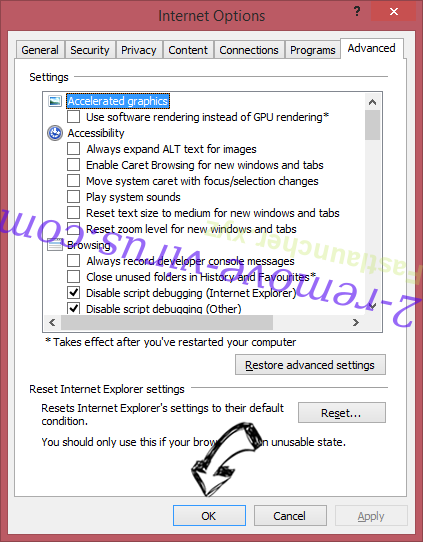
Reset your browser
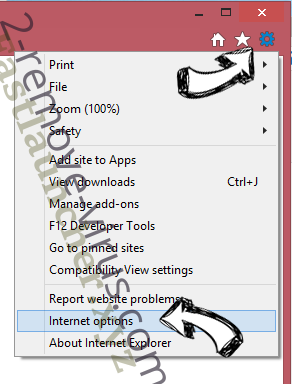
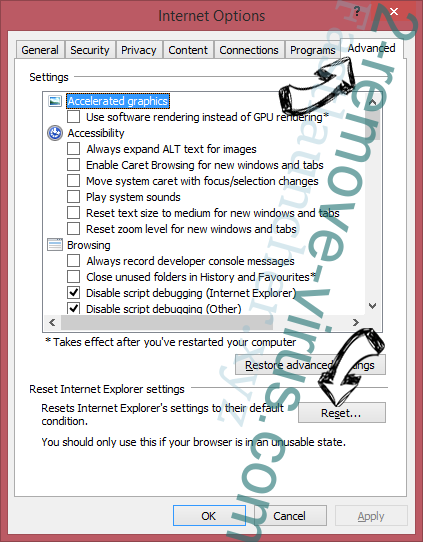
- Click the Gear icon and move to Internet Options.
- Open the Advanced tab and press Reset.
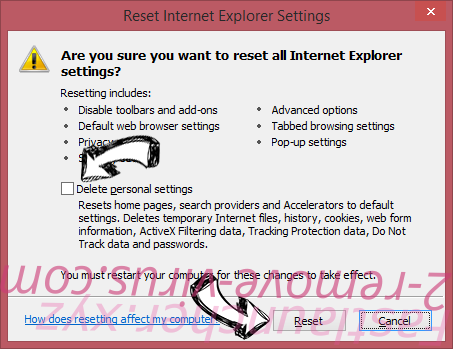
- Choose Delete personal settings and pick Reset one more time.
- Tap Close and leave your browser.
- If you were unable to reset your browsers, employ a reputable anti-malware and scan your entire computer with it.
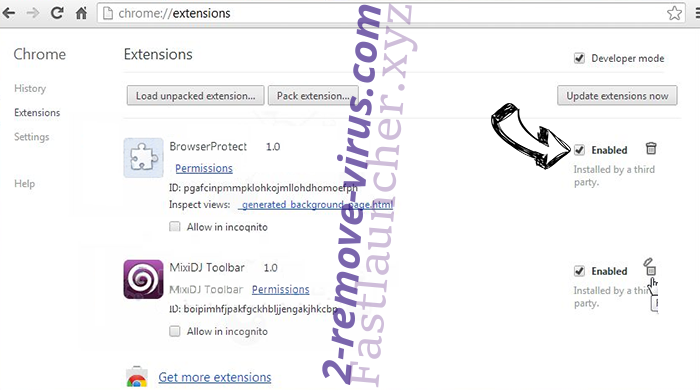
Erase EasyPhotoEdit from Google Chrome
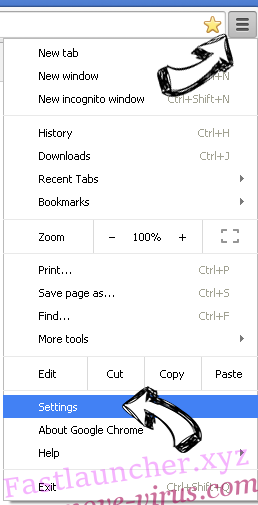
- Access menu (top right corner of the window) and pick Settings.
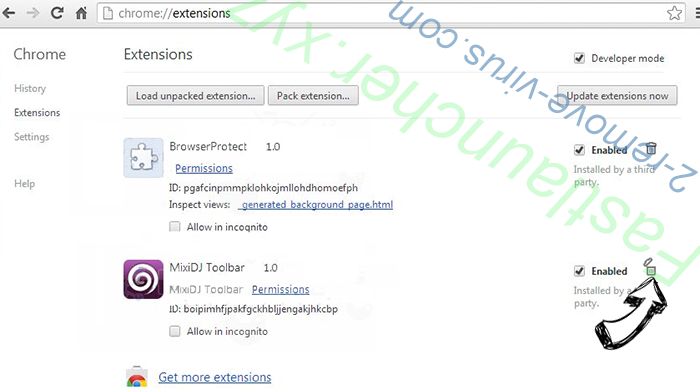
- Choose Extensions.
- Eliminate the suspicious extensions from the list by clicking the Trash bin next to them.
- If you are unsure which extensions to remove, you can disable them temporarily.
Reset Google Chrome homepage and default search engine if it was hijacker by virus
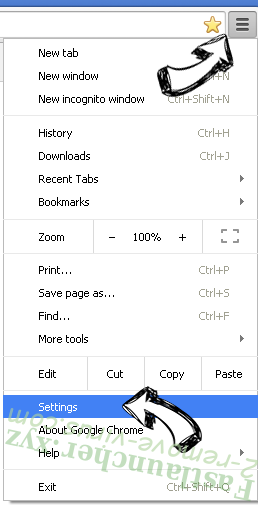
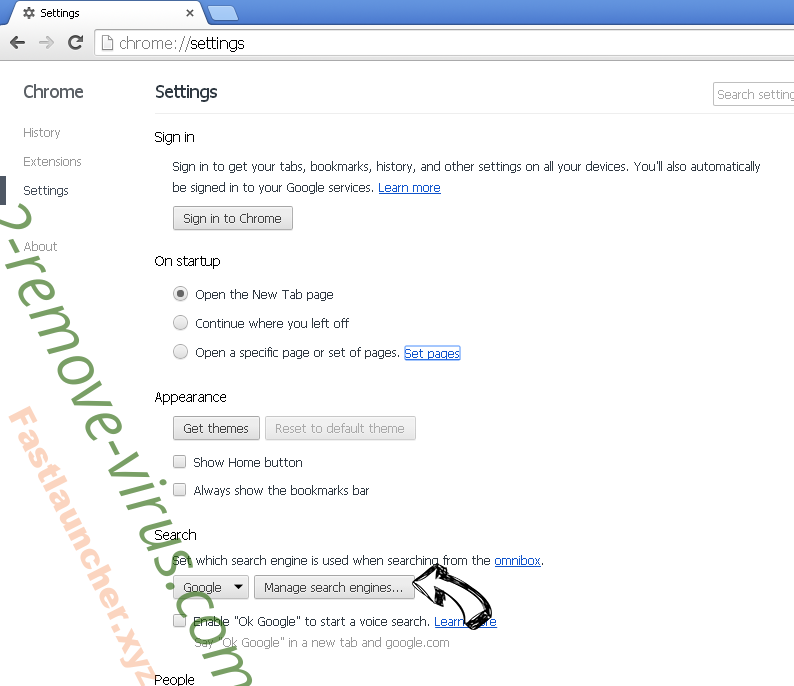
- Press on menu icon and click Settings.
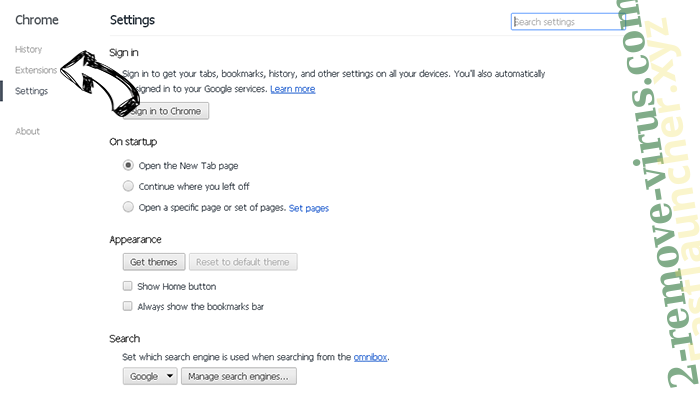
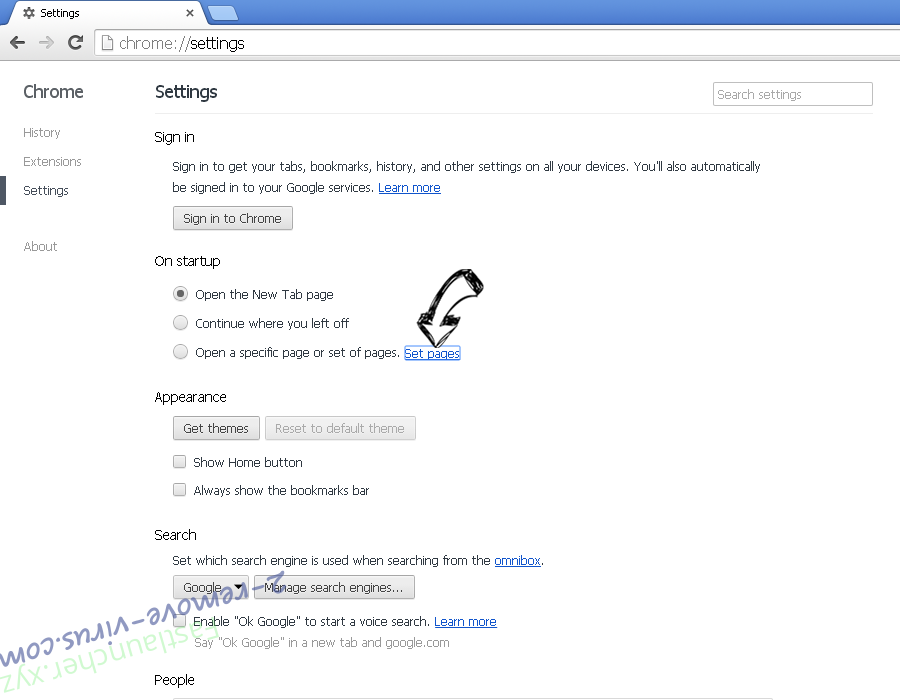
- Look for the “Open a specific page” or “Set Pages” under “On start up” option and click on Set pages.
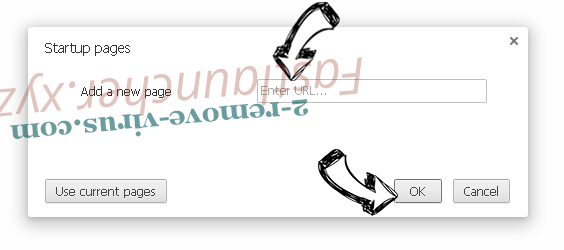
- In another window remove malicious search sites and enter the one that you want to use as your homepage.
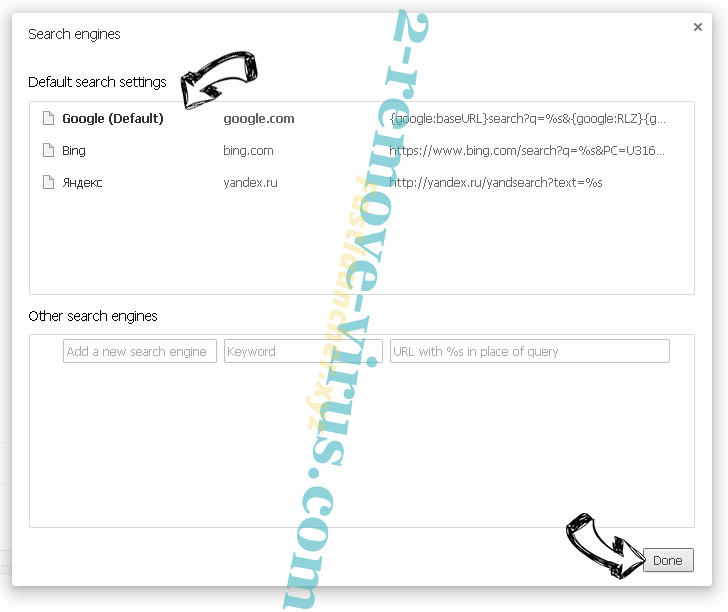
- Under the Search section choose Manage Search engines. When in Search Engines..., remove malicious search websites. You should leave only Google or your preferred search name.
Reset your browser
- If the browser still does not work the way you prefer, you can reset its settings.
- Open menu and navigate to Settings.
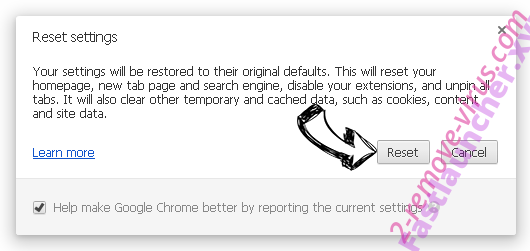
- Press Reset button at the end of the page.
- Tap Reset button one more time in the confirmation box.
- If you cannot reset the settings, purchase a legitimate anti-malware and scan your PC.

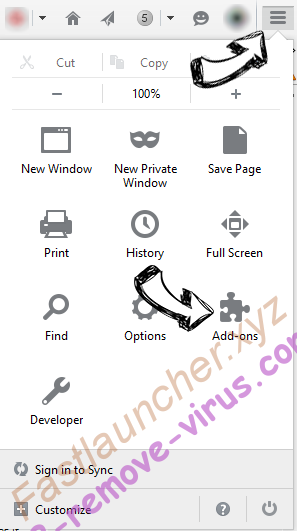
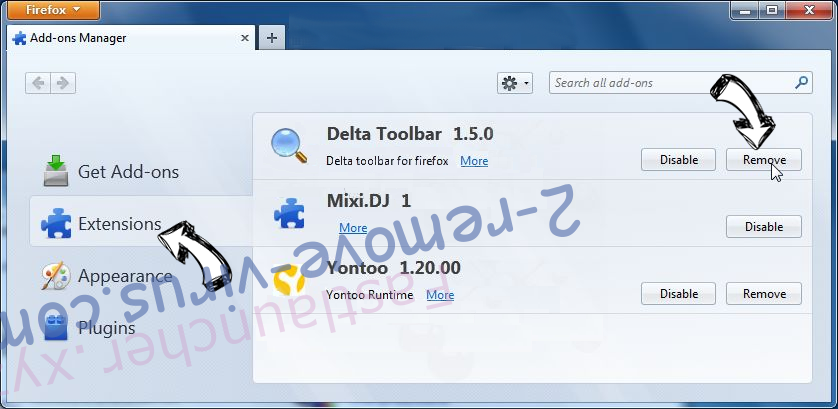
Remove EasyPhotoEdit from Mozilla Firefox
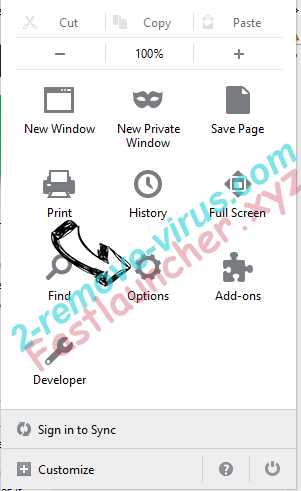
- In the top right corner of the screen, press menu and choose Add-ons (or tap Ctrl+Shift+A simultaneously).
- Move to Extensions and Add-ons list and uninstall all suspicious and unknown entries.
Change Mozilla Firefox homepage if it was changed by virus:
- Tap on the menu (top right corner), choose Options.
- On General tab delete malicious URL and enter preferable website or click Restore to default.
- Press OK to save these changes.

Reset your browser
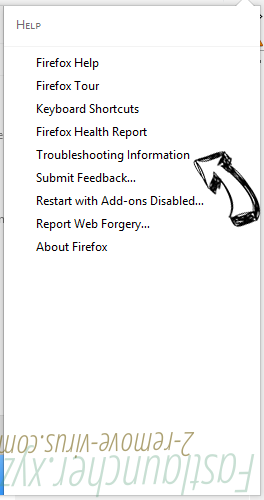
- Open the menu and tap Help button.
- Select Troubleshooting Information.
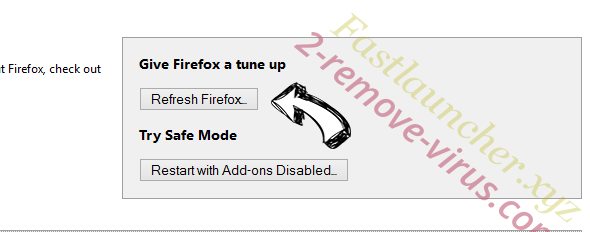
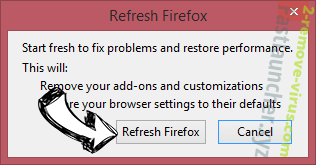
- Press Refresh Firefox.
- In the confirmation box, click Refresh Firefox once more.
- If you are unable to reset Mozilla Firefox, scan your entire computer with a trustworthy anti-malware.
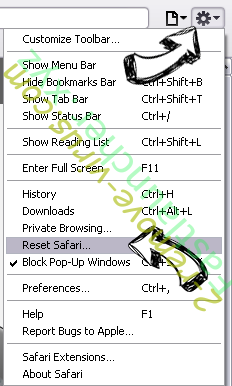
Uninstall EasyPhotoEdit from Safari (Mac OS X)
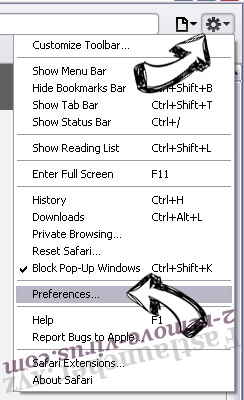
- Access the menu.
- Pick Preferences.
- Go to the Extensions Tab.
- Tap the Uninstall button next to the undesirable EasyPhotoEdit and get rid of all the other unknown entries as well. If you are unsure whether the extension is reliable or not, simply uncheck the Enable box in order to disable it temporarily.
- Restart Safari.
Reset your browser
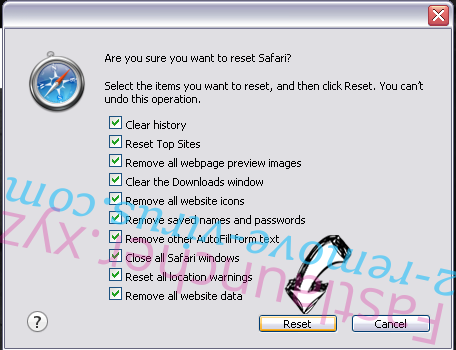
- Tap the menu icon and choose Reset Safari.
- Pick the options which you want to reset (often all of them are preselected) and press Reset.
- If you cannot reset the browser, scan your whole PC with an authentic malware removal software.
Offers
Download Removal Toolto scan for EasyPhotoEditUse our recommended removal tool to scan for EasyPhotoEdit. Trial version of provides detection of computer threats like EasyPhotoEdit and assists in its removal for FREE. You can delete detected registry entries, files and processes yourself or purchase a full version.
More information about SpyWarrior and Uninstall Instructions. Please review SpyWarrior EULA and Privacy Policy. SpyWarrior scanner is free. If it detects a malware, purchase its full version to remove it.
WiperSoft Review Details WiperSoft (www.wipersoft.com) is a security tool that provides real-time security from potential threats. Nowadays, many users tend to download free software from the Intern ...
Download|moreIs MacKeeper a virus? MacKeeper is not a virus, nor is it a scam. While there are various opinions about the program on the Internet, a lot of the people who so notoriously hate the program have neve ...
Download|moreWhile the creators of MalwareBytes anti-malware have not been in this business for long time, they make up for it with their enthusiastic approach. Statistic from such websites like CNET shows that th ...
Download|more

Site Disclaimer
2-remove-virus.com is not sponsored, owned, affiliated, or linked to malware developers or distributors that are referenced in this article. The article does not promote or endorse any type of malware. We aim at providing useful information that will help computer users to detect and eliminate the unwanted malicious programs from their computers. This can be done manually by following the instructions presented in the article or automatically by implementing the suggested anti-malware tools.
The article is only meant to be used for educational purposes. If you follow the instructions given in the article, you agree to be contracted by the disclaimer. We do not guarantee that the artcile will present you with a solution that removes the malign threats completely. Malware changes constantly, which is why, in some cases, it may be difficult to clean the computer fully by using only the manual removal instructions.